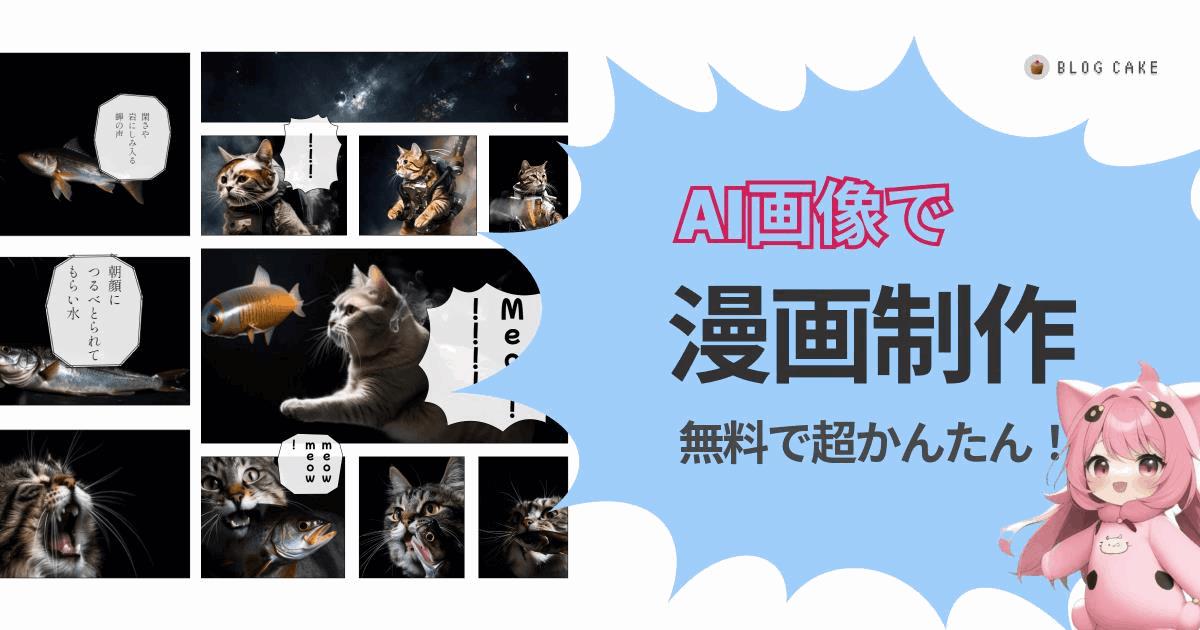
【無料】AI画像で簡単に漫画を作る方法!!!


こんにちは、画像生成AIでひたすら猫のイラストを生成している じょじお(@jojio‗illust)です。
この記事はAI画像を簡単に漫画にできるツールを見つけたので使ってみました!という記事です。

▲AI画像の大量ファイルをプロンプトと一緒に簡単に整理する方法はこちら。
Stable Diffusionのプロンプトエンジニアリングの基本について理解したい方には、初心者向けのプロンプトガイドを作りましたのでそちらを見てください!
AI画像で簡単に漫画を作る方法: あなたも「サイバーパンク桃太郎」のような作品を!
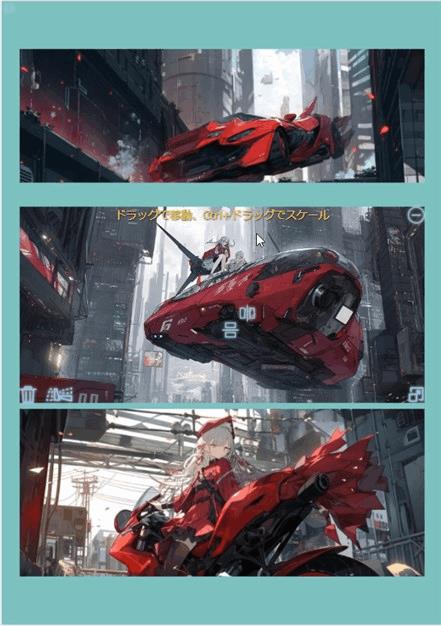
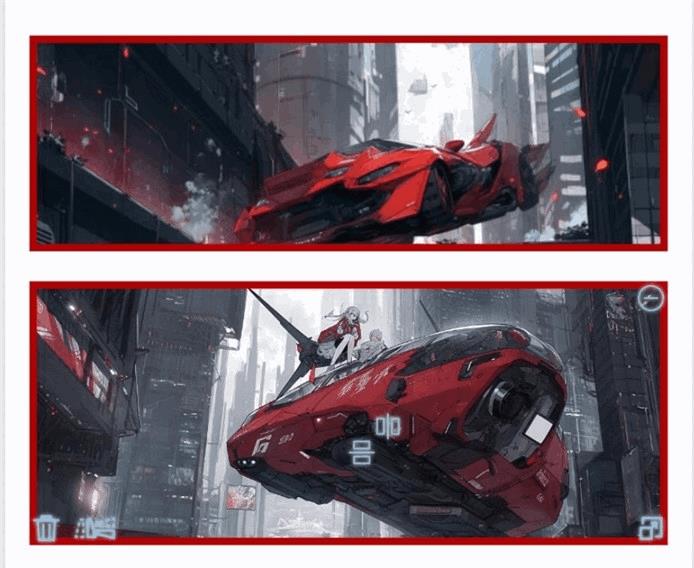
AI画像を使って製作された漫画「サイバーパンク桃太郎」をご存知でしょうか?この作品のような斬新なアイデアを簡単に実現できるツールが登場しました。今回ご紹介する「FramePlanner」です。
この記事では、AI画像を駆使して誰でも手軽に漫画制作ができる方法をお伝えします。

▲画像生成AIであるMidjourneyで生成した画像を使って製作された漫画「サイバーパンク桃太郎」はこちら。
FramePlannerとは?
FramePlannerは、AI画像生成ユーザーのじょにがたロボ(@jonigata_ai)さんが開発中の簡易マンガ制作ツールです。
WEBサービスを開き、いくつかの漫画原稿タイプを選択し、そこに画像をドラッグアンドドロップして、吹き出しを追加することができます。
ログイン不要で使うことができ、Web上で完結できます。
 じょじお
じょじお思いついたアイデアを最短で形にできるツールだと思います。

▲今回はAI画像の生成にMidjourney を使いました。少ない言葉(プロンプト)でもきれいな画像を生成できるので初心者の方におすすめです。

▲無料でAI画像を生成したい方はMicrosoftのBingAIがおすすめです。ChatGPTを開発したOpenAI社の「DallE」がベースとなっている頭の良いAIを無料使うことができます。
FramePlannerを使い方。
じょじお私も使ってみましたので、ざっくりと漫画制作の流れを紹介します!
FramePlannerを使った漫画制作の流れ
- コマ割りのフォーマット・用紙を選択する。
- 画像をドラッグアンドドロップ
- セリフ追加
- 完成したらダウンロード
FramePlannerを開く。

▲ブラウザでFramePlannerにアクセスします。
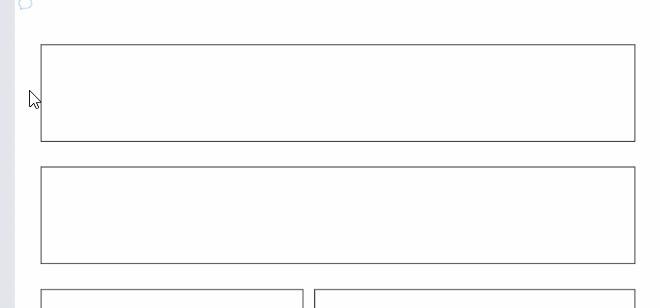
コマ割りとサイズを決める

▲ベースとなるコマ割りタイプと用紙サイズを決めます。コマ割りは後から変更できます。
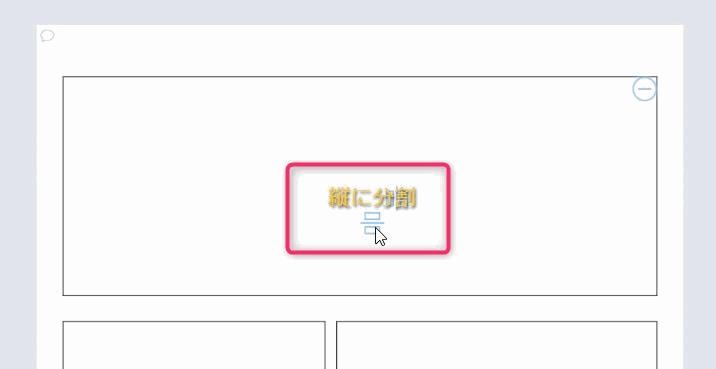
▲コマを分割したい場合は、分割したいコマの中央にマウスを合わせると「縦に分割」、「横に分割」というメニューが表示されるので、そこをクリックします。
▲縦に分割してみました。
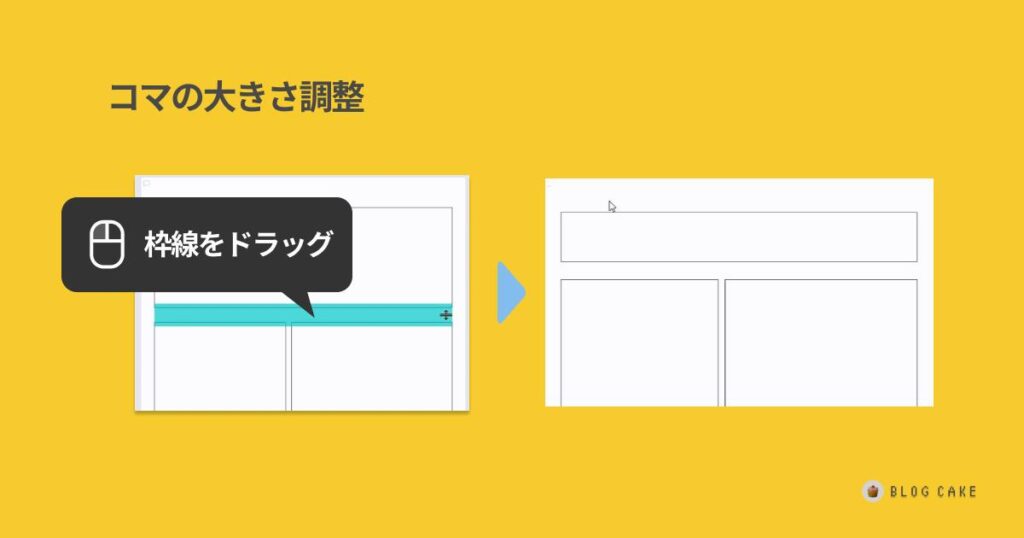
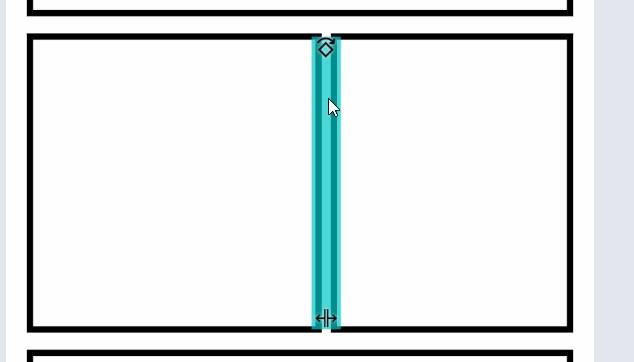
▲枠線をドラッグするとコマの大きさの割合を調整できます。
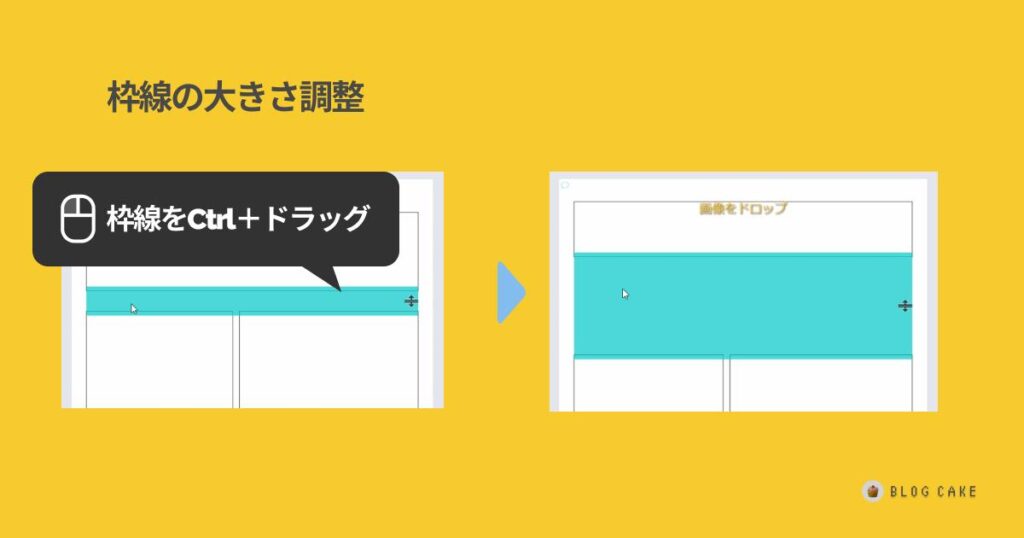
▲枠線をCtrl+ドラッグすると枠線の幅を広くしたり、狭くしたりできます。
画像を追加する。
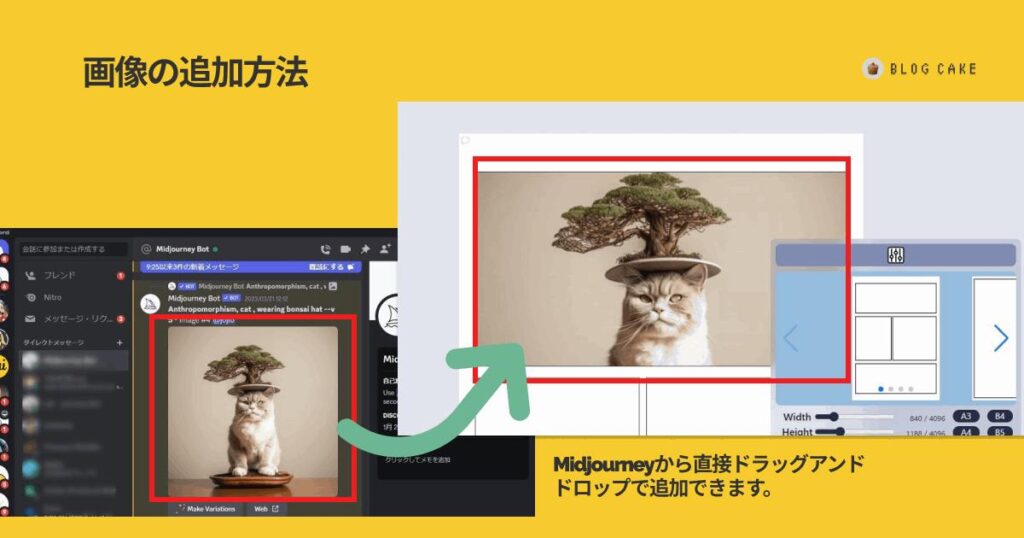
▲画像はドラッグアンドドロップで追加できます。
じょじおDiscord(Midjourney)やWebUI(Stable Diffusion)から直接ドラッグアンドドロップができます。一旦DLする必要がないので楽です。
※Midjourneyは、一度Discord上で画像をクリックして拡大させた状態からドラッグアンドドロップします。
セリフ(吹き出し)の追加
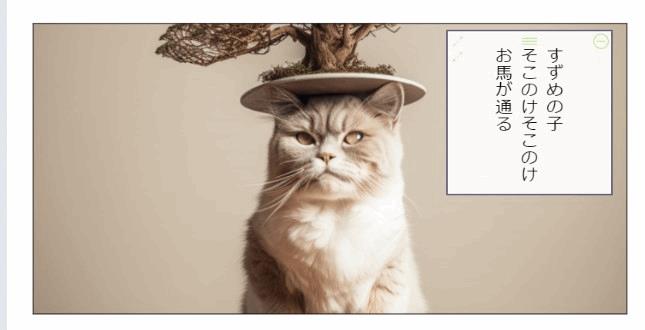
▲吹き出しをいれたいところでFキーを押しながらドラッグすると吹き出しを追加できます。
- F+ドラッグ: 吹き出し作成
- Q+クリック: 吹き出し削除
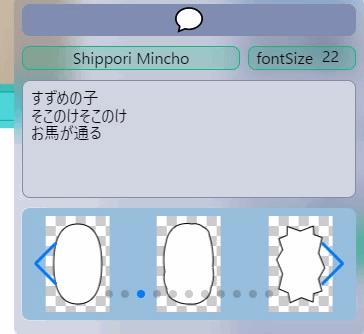
▲吹き出しをクリックすれば吹き出しのシェイプを変更できます。
ダウンロード
作成した漫画はツールボックスのダウンロードボタンから、JPG形式でダウンロードが可能です。
使い方の詳細(ヘルプ)
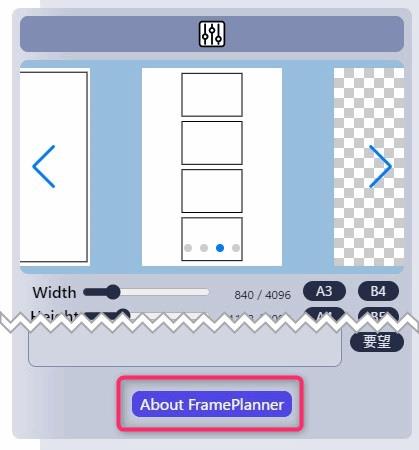
▲その他の使い方はツールボックスのAbout FramePlannerから、チートシートを呼び出して確認できます。
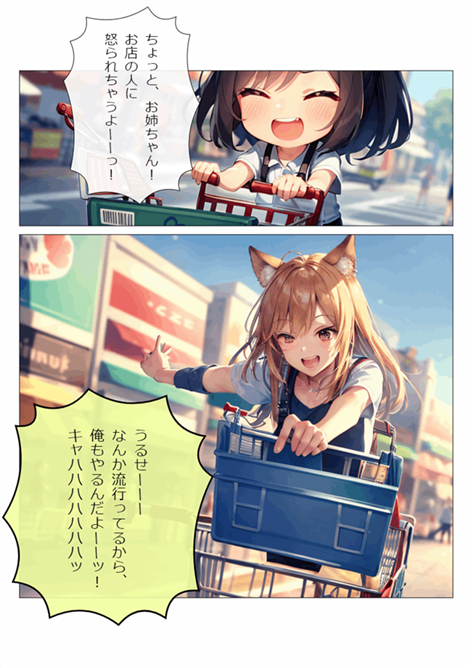
FramePlannerで使った漫画
じょじお私が制作した漫画を紹介します。
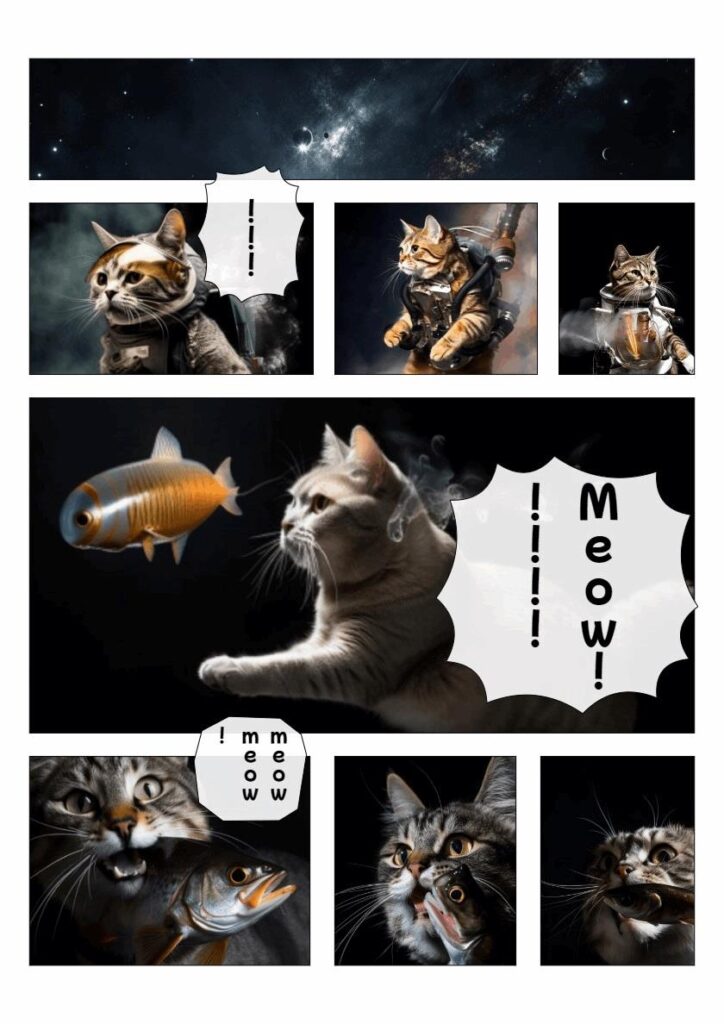
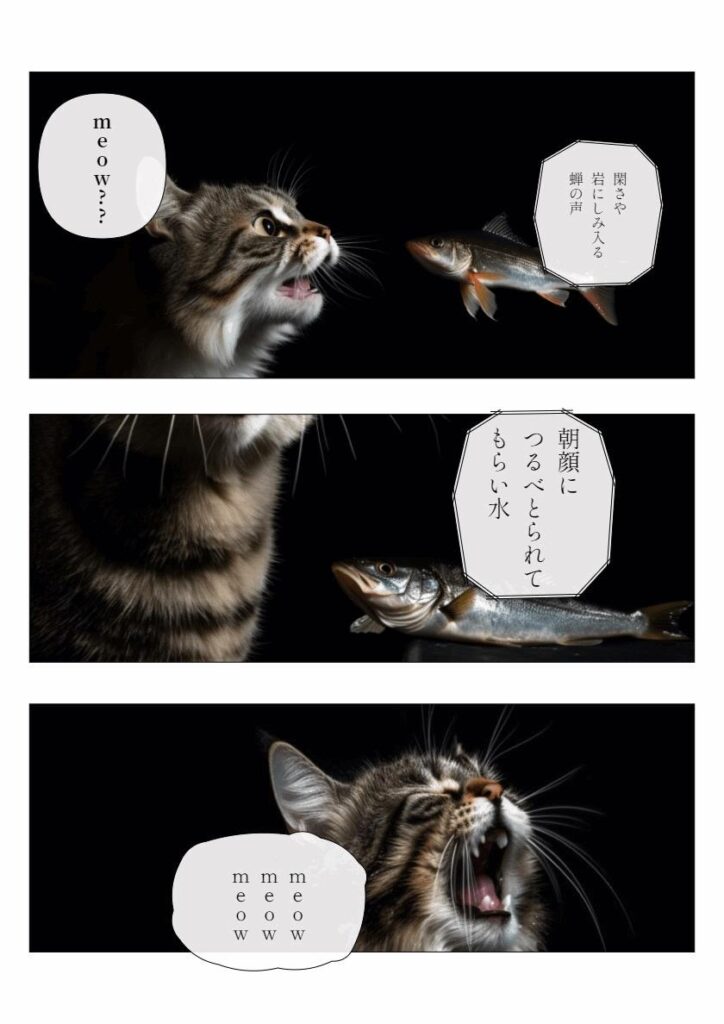
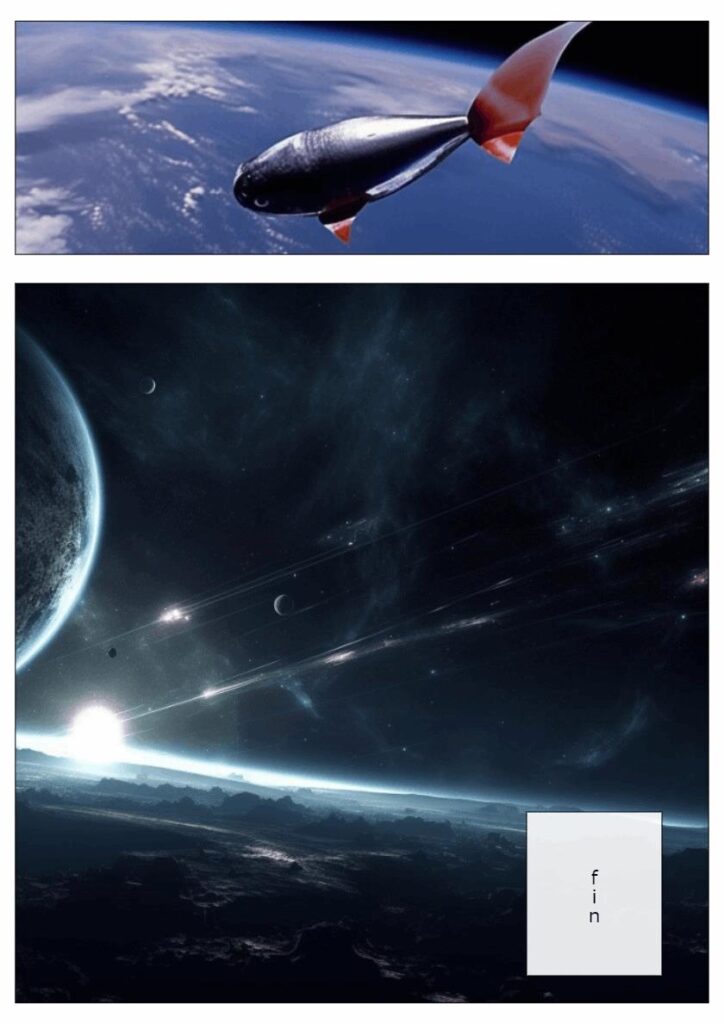 じょじお
じょじおいかがでしょうか。1時間程度で作成したのですが、
なんとなくマンガっぽいものができました。
4コマ漫画も作れるよ。
デフォルトで4コマ漫画のフォーマットもあります。
AI漫画制作のコツ
AIは同じ顔のキャラクターを生成することが苦手といわれています。
一貫したキャラクターを生成するには、バリエーション機能や、画像から似たような画像を生成できるImage-to-Imageなどのテクニックが必要です。
参考
Midjourney ユーザーの方は下記の記事がおすすめです。
複数ページの漫画を作る方法
現在、FramePlannerには、複数ページ作成する機能は無いようです。
筆者はブラウザの別タブで新しくFramePlannerを開き、そちらで2ページ目を作成しました。
FramePlannerの今後の追加機能について
FramePlannerは、頻繁に更新が行われているので今後も、もっと便利な機能追加が期待できそうです。
改善要望も受けて付けていて、筆者も「横書きについての対応のお願い」など、いくつか要望を送ってみました。機能追加されることを楽しみに気長に待ちたいと思います。
開発状況をチェックしたい方はじょにがたロボさんのツイッターを是非チェックしてみてください。
FramePlannnerの新しい機能(追記-4月4日)
アップデート速すぎて追い付かないけど、いくつか追加機能が発表されていたので、下記に紹介します。
セリフの横書きに対応。

斜めの枠線が可能に。
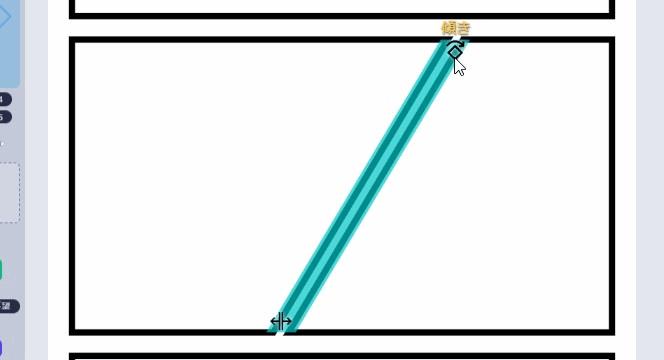
枠線にマウスカーソルを合わせると「傾き」という文字が表示されるので、それをドラッグっすると斜めの枠線が作れます。
画像を左右反転できるようになった。

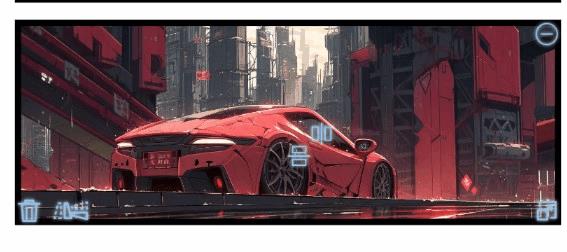
▲画像挿入されたコマにマウスカーソルを合わせると、左右反転メニューが表示されます。そこをクリックすると画像が左右反転配置されます。
吹き出しに画像を挿入できるようになった。
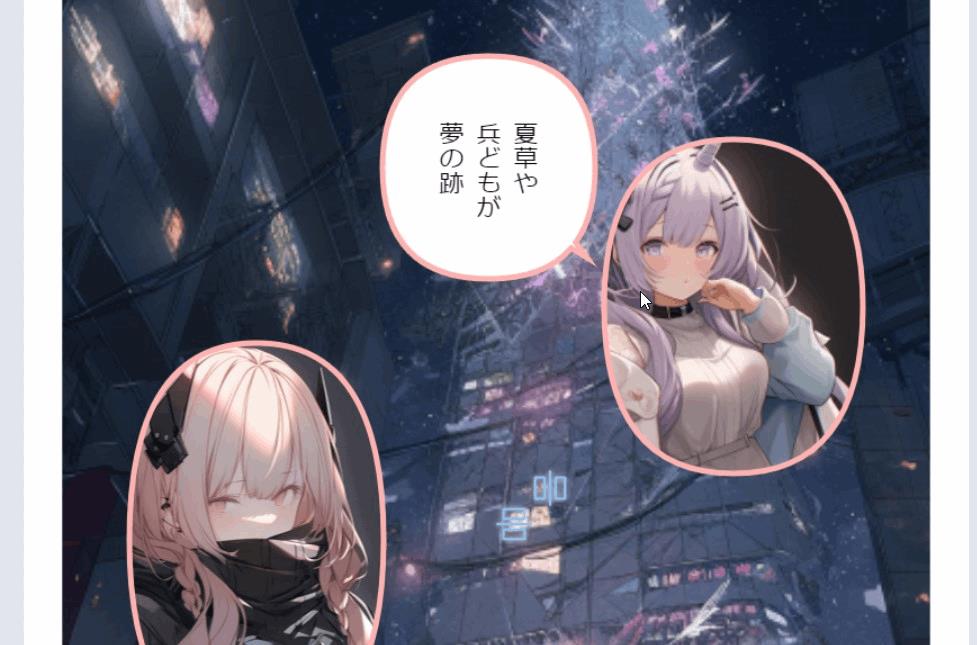
▲ふきだしに画像を挿入できるようになったので、こういう複雑なコマ割りができるようになりました。
吹き出しがリンクできるようになりました。
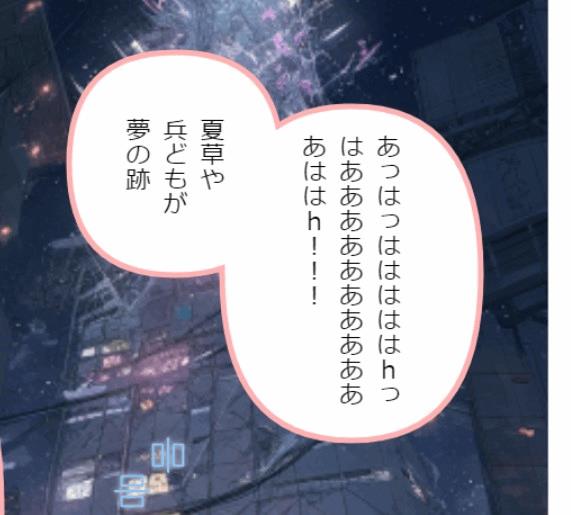
▲吹き出し同士をリンクして、複雑なシェイプの吹き出しをつくれるようになりました。
吹き出しのしっぽが付けられるようになりました。

▲吹き出しのしっぽに対応しました。
集中線吹き出しが追加!
▲吹き出しのシェイプから「集中線」を選ぶと、集中線を付けれれるようになります。集中線を使う場合は、セリフに空っぽにすればいいみたいです。
枠線の色・用紙背景の色が変更可能になった。
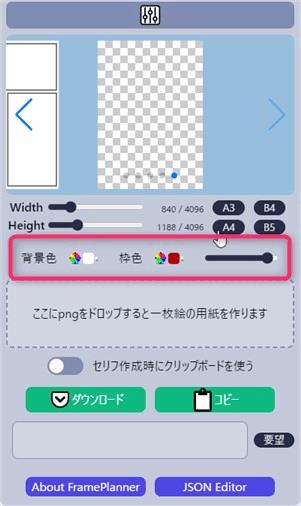
▲背景や枠線の色変更は、上図の赤枠のところで変更できます。透明度も変更できます。
参考
FramePlannerはオープンソースのため、Githubでソースを公開されているようです。
Github:https://github.com/jonigata/FramePlanner2
まとめ
以上、AIで漫画を制作するためのツール「FramePlanner」の紹介でした。
じょじお最後まで読んでくださってありがとうございます!
この記事がお役に立てましたら、シェアボタンからシェアしていただけたら嬉しいです!

【おすすめUdemy講座】Midjourney始め方から応用まで網羅!【完全版】
【おすすめUdemy講座】ジェネレーティブAI(生成AI)入門【ChatGPT/Midjourney】 -プロンプトエンジニアリングが開く未来-
コメント